Industry News
How to Install an LC Fiber Optic Fast Connector?
2026-01-03
In modern fiber optic network cabling, the LC fiber optic fast connector has become a core component in FTTH (Fiber to the Home) and data center construction due to its small size, low loss, and ease of operation. It allows for cold splicing on-site with simple tools, eliminating the need for complex fusion splicing equipment and greatly improving construction efficiency.
Content
I. Preparation: Required Tools and Materials
Before starting the installation, please ensure you have the following professional tools to guarantee connection quality:
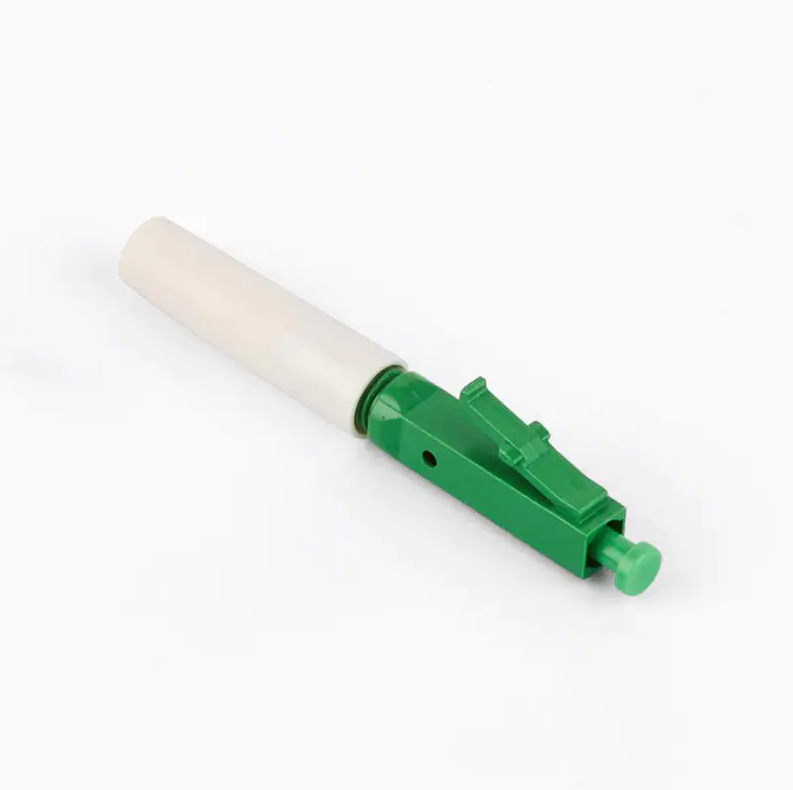
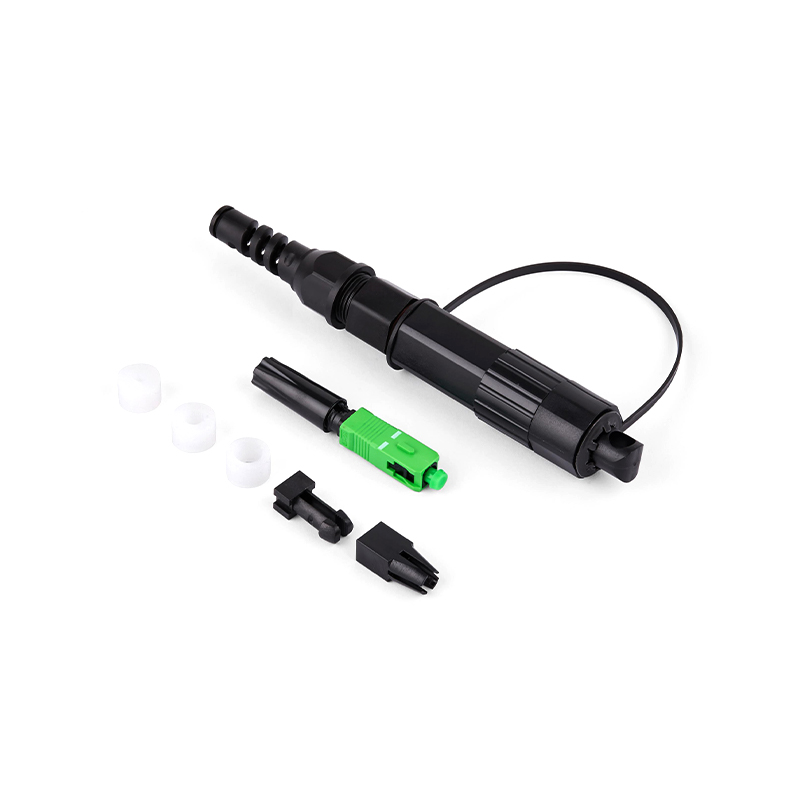
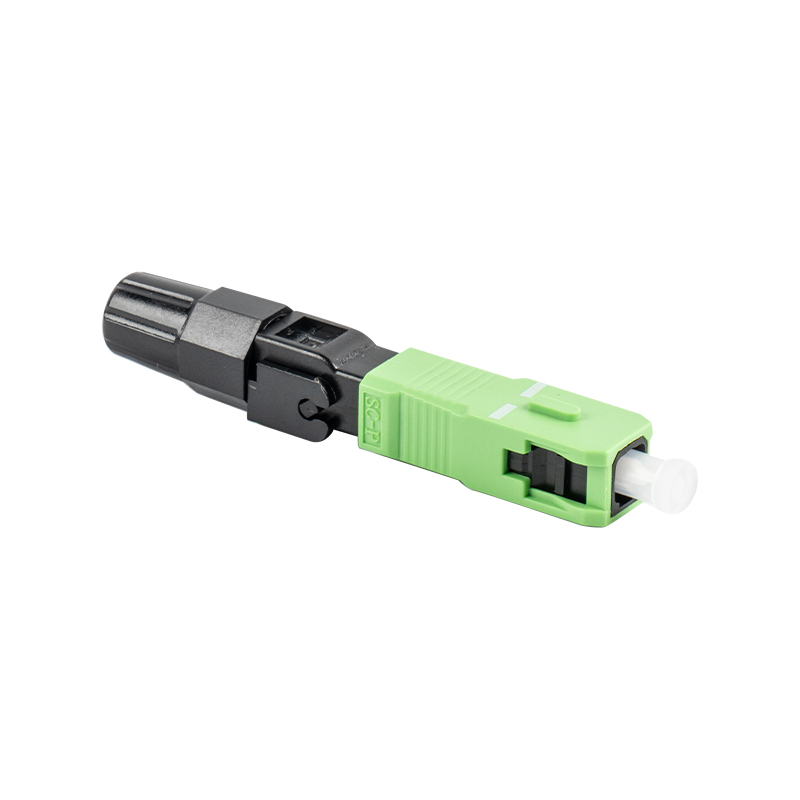
- LC fiber optic fast connector components
- Fiber optic stripping pliers (Miller pliers)
- Fiber optic length stripper
- High-precision fiber optic cleaver
- Lint-free wipes and high-purity alcohol
- Visual fault locator (red light pen)
II. LC Fiber Optic Fast Connector Installation Steps
1. Insert the Tail Cap
First, insert the tail cap of the LC fiber optic fast connector onto the fiber in advance. This is the easiest step to forget; if you try to install it after processing the fiber, you will have to redo the process.
2. Strip the Fiber Coating
Use the stripping pliers to remove the outer jacket and inner coating of the fiber. A stripping length of 40mm-50mm is usually recommended. Apply even pressure during this process to avoid damaging the glass fiber surface.
3. Clean the Fiber
Use a lint-free wipe dampened with alcohol to clean the bare fiber. This step is crucial, as any minute dust particles will increase the insertion loss of the fiber optic connector.
4. Cleave the Fiber
Place the cleaned fiber into the length stripper and cleave it according to the specifications required by the LC fiber optic fast connector (usually a bare fiber length of 10mm-12mm is required). Use a high-precision cleaver to ensure a flat end face.
5. Insert and Lock
Carefully insert the prepared fiber into the connector body. When you observe a slight bend ("micro-bend") in the fiber inside the connector, it indicates that the fiber has made full contact with the pre-embedded fiber core. At this point, press the locking switch to secure the fiber and tighten the tail cap.
6. Performance Testing
After installation, it is recommended to perform a preliminary test using a red light pen. If there is no obvious light leakage at the connector, it indicates a successful cold splice.
III. Tips for Improving the Performance of LC Fiber Optic Quick Connectors
To ensure the long-term stability of the fiber optic network, the following should be noted when using LC fiber optic quick connectors:
End-face protection: Before insertion, do not allow the fiber end-face to come into contact with any object.
Clean environment: Operate in a dust-free environment as much as possible to avoid environmental contamination affecting signal transmission.
Repeated use: Although most LC fiber optic quick connectors support multiple connections, frequent disassembly and reassembly will increase losses. It is recommended to complete the connection in one go whenever possible.
Mastering the correct installation method of LC fiber optic quick connectors can not only reduce construction costs but also effectively guarantee the stability of network bandwidth. With the popularization of fiber optic communication technology, this efficient cold splicing solution is becoming the mainstream in the industry.


get in Touch

No.255 Lianfei Road, KandunIndustrial Park, Cixi City, ZhejiangProvince, China
Product Center
contact details
-
Email: [email protected]
-
Tel: +86 18367407397
Mobile
Copyright ? Ningbo Goshining Communication Technology Co., Ltd. Fiber Optic Solutions Manufacturer Fiber Optic Products Factory
